 Save
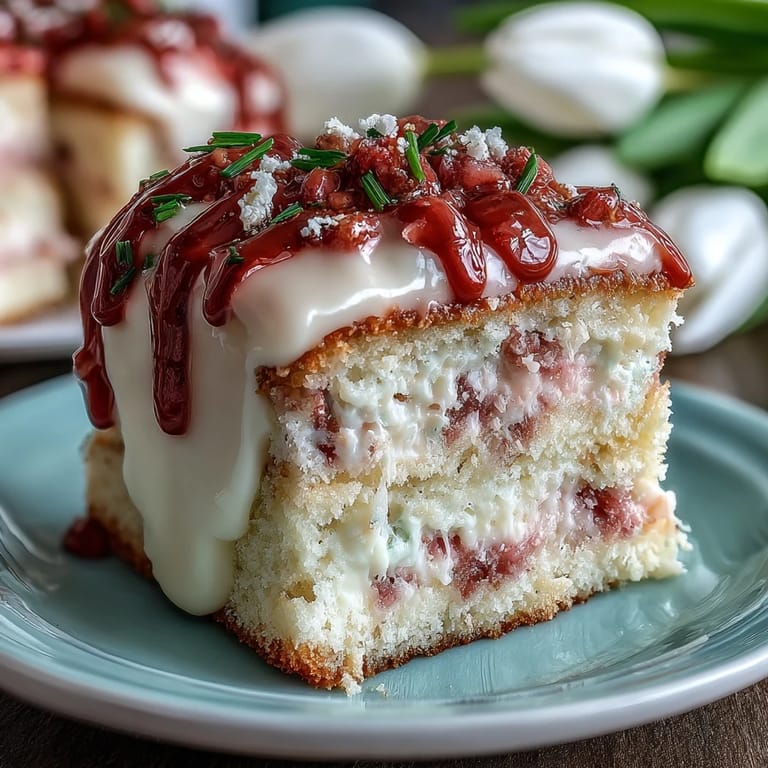
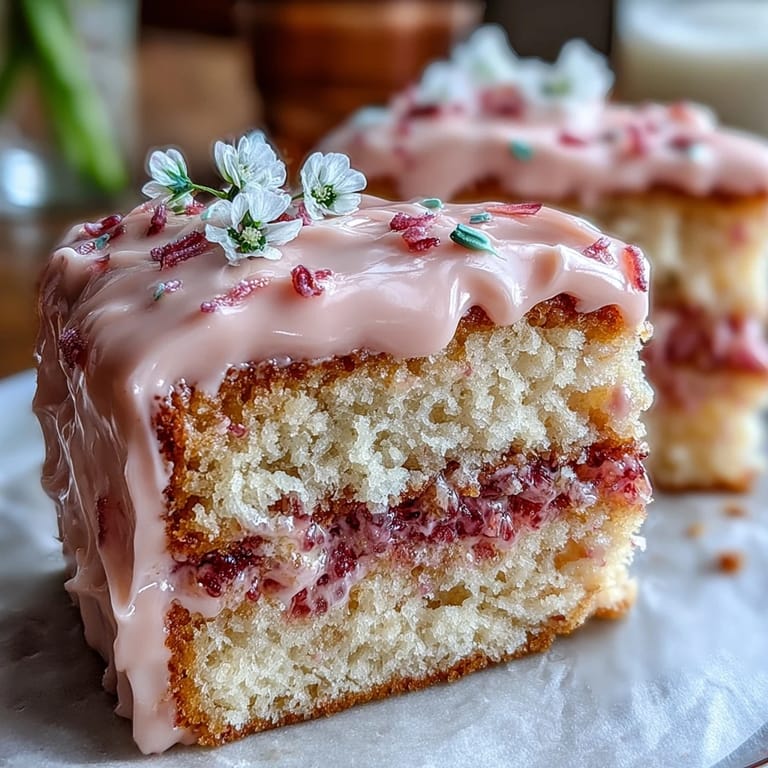
Save The first time I attempted an ombre cake, I was standing in my kitchen on a gray April afternoon, staring at three bowls of plain batter like they were blank canvases waiting for something magical. My sister was getting married in the spring, and I wanted to bake her something that felt like the season itself—soft, hopeful, and impossibly beautiful. I'd never worked with food coloring before, and I remember being terrified of turning everything muddy brown, but something about layering those pastel pinks and yellows felt like the right way to celebrate.
I'll never forget sliding that finished cake onto the dessert table at the reception, watching my sister's face light up like she'd stumbled into a fairy tale. The afternoon sun hit those pink and yellow layers just right, and suddenly everyone at the party wanted to know where I'd bought it. When I admitted I'd made it, the room went quiet for a second before erupting into questions—it gave me the kind of quiet confidence that only comes from doing something that scares you and watching it turn beautiful.
Ingredients
- All-purpose flour: Three cups gives you the right structure without being too heavy, and measuring by weight keeps everything consistent across batches.
- Baking powder: Two and a half teaspoons is the sweet spot for a tender crumb that rises evenly, not a bouncy sponge cake.
- Unsalted butter: Room temperature is non-negotiable here because cold butter won't cream properly with the sugar, and your cake will feel dense instead of cloud-like.
- Granulated sugar: Two cups aerates as you beat it with the butter, creating those tiny air pockets that make the cake so light.
- Eggs: Room temperature eggs emulsify better with the butter mixture, and they'll blend into the batter more smoothly than cold ones straight from the fridge.
- Whole milk: The fat content keeps the cake tender, and room temperature milk won't shock the batter and cause separation.
- Gel food coloring: Gel is your friend here because it won't thin out your batter like liquid food coloring does, and the colors stay true as they bake.
- Powdered sugar for buttercream: Sifting it removes lumps and gives you a smooth, silky frosting without any gritty texture.
Tired of Takeout? 🥡
Get 10 meals you can make faster than delivery arrives. Seriously.
One email. No spam. Unsubscribe anytime.
Instructions
- Gather and prepare:
- Preheat your oven to 350°F and get those three cake pans lined with parchment—this step takes two minutes but saves you so much heartache when you're trying to flip warm cakes.
- Make the base batter:
- Whisk your dry ingredients together, then cream the butter and sugar until it's pale and fluffy, about three to four minutes of steady beating. Add eggs one at a time, waiting until each one is fully incorporated before adding the next, then fold in the flour and milk in alternating additions, starting and ending with flour.
- Divide and tint:
- Pour the batter into three bowls and add just a tiny bit of food coloring to each—you're going for pastel, not parade float, so start with less than you think you need. A toothpick dab of gel coloring goes a long way, and you can always add more if you want deeper shades.
- Bake with intention:
- Divide the batter evenly among the three pans, smooth the tops, and bake for 22 to 26 minutes until a toothpick comes out clean. The cakes will smell buttery and a little sweet, and they'll spring back gently when you press the top with your finger.
- Cool properly:
- Let them sit in the pans for 10 minutes to set slightly, then flip them onto wire racks to cool completely—rushing this step will cause them to crack.
- Make the frosting:
- Beat the butter until it's pale and creamy, then gradually add the powdered sugar, vanilla, and milk, beating until it's fluffy and spreadable. Divide the frosting into three bowls and tint each one to match your cake layers.
- Level and layer:
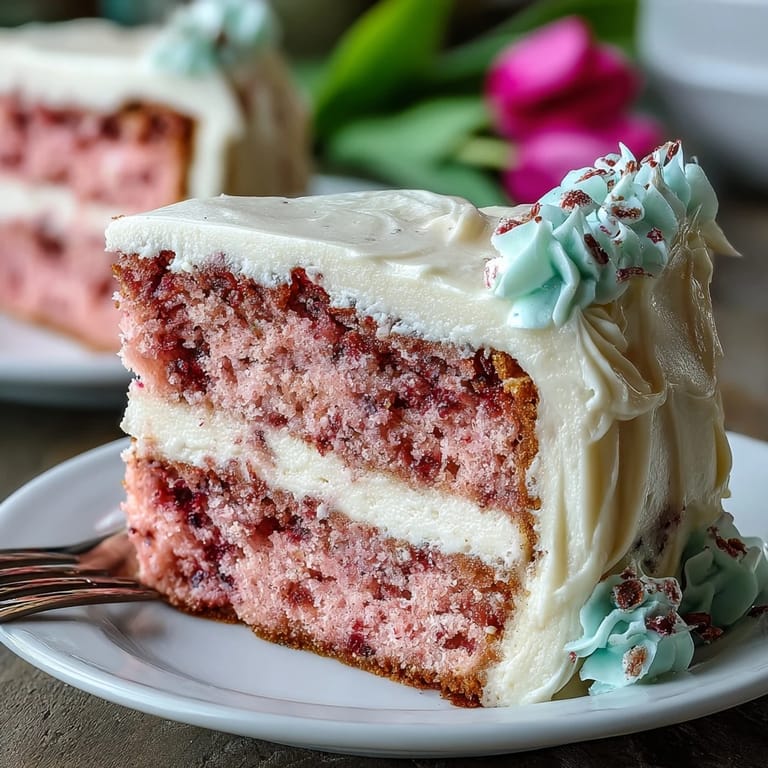
- If your cakes have domed tops, trim them level with a serrated knife so everything stacks evenly. Place the yellow layer on your cake base, spread with yellow frosting, then add the middle layer and frost with plain buttercream, then the pink layer with pink frosting on top.
- Create the ombre magic:
- This is where the cake transforms—use an offset spatula or cake scraper to spread the remaining frosting on the sides, blending yellow at the bottom gradually into pink at the top. Work in small sections and let the colors blend naturally instead of trying to make hard lines.
- Finish and chill:
- Add pastel sprinkles or edible flowers if you like, then chill the whole cake for at least 30 minutes so the frosting sets and your slices come out clean.
 Save
Save Years later, I still make this cake for spring celebrations, and it's become my little signature move—the thing people ask for when something good is worth celebrating. What started as a nervous experiment has turned into a quiet ritual, a way of saying I see you and you deserve something beautiful.
Choosing Your Ombre Colors
The magic of this cake isn't just in the technique—it's in committing to a color story before you start. I learned this the hard way when I tried to play it safe with barely-tinted layers, and the ombre fell flat because there wasn't enough contrast between the colors. Now I test my food coloring intensity on a white plate first, holding it up to the light to see what it will look like inside the frosting. You want each color distinct enough that someone can see the gradient, but soft enough that it still feels spring and dreamy, not loud or artificial.
The Leveling Game
Leveling your cake layers is the step that separates wobbly, leaning stacks from architectural marvels. A long serrated knife and a steady hand matter here, but more importantly, a freezer makes this easier than you'd think—pop those cooled layers in the freezer for 15 minutes before leveling and they'll cut so much more cleanly. I once skipped this step and ended up with a cake that looked like it had survived an earthquake, leaning at a concerning angle, but it tasted incredible so nobody minded the lean.
Storage and Serving Secrets
This cake actually improves after sitting overnight, when the frosting and sponge integrate and the flavors become more cohesive and balanced. Leaving it at room temperature under a cake dome keeps it tender, but if you need it to last longer, the refrigerator is your friend. The cold also makes the frosting set firmer, which means your slices will look sharp and intentional instead of smudged, and you can make the cut a few hours ahead of your event so plating is effortless when guests arrive.
- A bench scraper or offset spatula held at a 45-degree angle glides through cold frosting like it's meant to be there.
- If the frosting cracks as you slice, your knife might be too cold—run it under warm water and dry it between each cut.
- This cake freezes beautifully unfrosted for up to a month, so you can bake ahead and decorate the day of.
 Save
Save This cake is proof that something made with patience and a little bit of faith in yourself will always taste and look better than anything you could buy. Bake it for someone you love, or bake it to celebrate yourself.
Recipe Questions & Answers
- → How do I achieve the ombre effect with pastel colors?
Divide the batter into three portions and tint each with different amounts of pink and yellow gel food coloring. Layer them in pans and blend matching buttercream shades for the gradient on the sides.
- → What type of flour is best for this cake?
All-purpose flour is recommended to achieve a tender yet sturdy crumb suitable for layering and frosting.
- → Can I prepare the layers in advance?
Yes, bake and cool the layers thoroughly. Wrap and refrigerate them for up to a day before assembling and frosting.
- → How can I ensure even baking across all layers?
Use three separate pans and bake simultaneously at 350°F (175°C) until a toothpick comes out clean, usually 22–26 minutes.
- → What causes the cake to be fluffy and light?
Beating butter and sugar until fluffy and carefully folding in eggs and flour mixture helps incorporate air, resulting in a tender texture.